
Tailor how conversations are organised and handled:
- Labels — create a shared set of tags for conversations and contacts.
- Custom Attributes — define extra fields to capture on conversations or contacts.
- Automation — set up rules that run actions automatically (assign, label, reply, and more) when your conditions are met.
Watch the walkthrough
Creating an automation rule
Every rule has three parts: an Event that sets it off, Conditions that must match, and Actions that run.
- Open Settings → Automation and click Create Automation.
- Enter a Rule Name and a Description.
- Under Event, choose when the rule is checked: Conversation Created, Conversation Updated, Conversation Opened, Conversation Resolved, Message Created or Attribute Changed.
- Under Conditions, add at least one condition — for example Channel, Inbox, Labels or Message Contains. Click Add Condition to combine several.
- Under Actions, add what should happen — for example Assign a Team, Add a Label, Send a Message or Apply Message Sequence. Click Add Action to add more.
- Click Create.
To change a rule later, click Edit on its row and click Update when you’re done. The Active column shows whether a rule is Off, Testers only or Live; click it to pick another state. A new rule starts Off.

Rules that act on a missed reply deadline are set up from the Reply SLA page instead — see Reply SLA.
Try a rule on your testers first
Switch a rule to Testers only and it runs only on conversations with your workspace testers, so you can check a new keyword rule, a label chain or a Send a Message action on your own team’s chats before customers set it off. The dialog shows the Workspace testers list; add a tester there if you need to, then click Switch. It is the one list under Settings → Account Settings → Testers, shared with your flow agents and message sequences — see Account (general) settings.
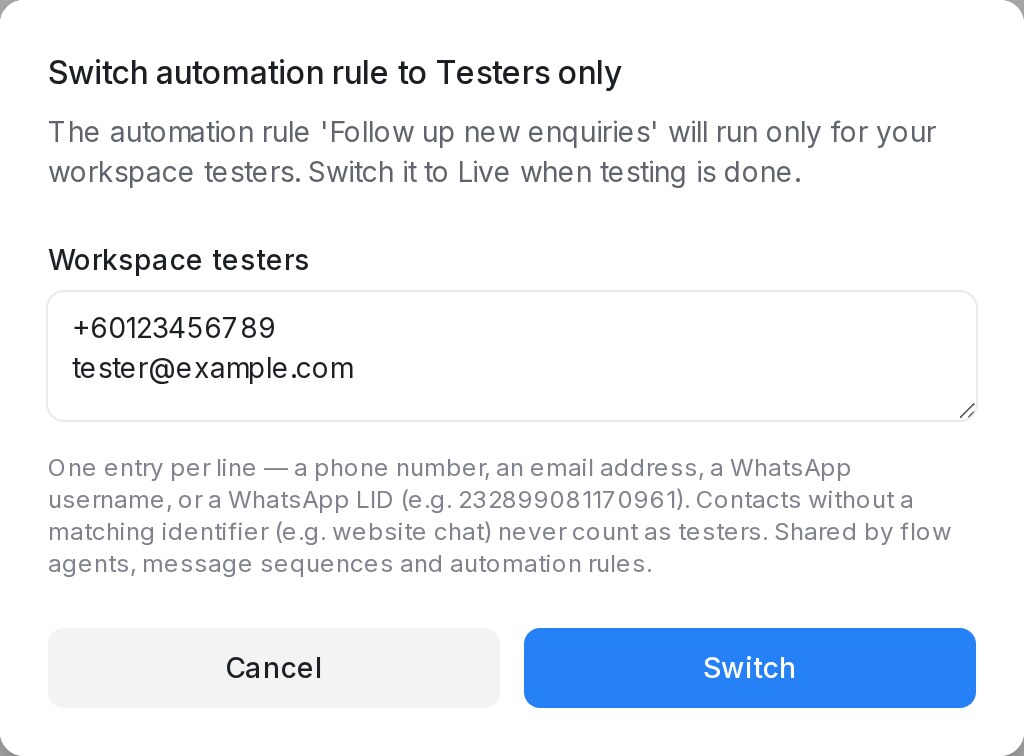
- A tester is a contact whose phone number, email, WhatsApp username or WhatsApp LID is on the list. On a conversation with anyone else, the rule does nothing.
- You need at least one tester on the list before you can switch.
- A duplicated rule starts Off and keeps Testers only when the original had it.
- When testing is done, switch the rule to Live.
Matching who sent the message
On the Message Created event, the Message Sender condition tells your team, your bots and your customers apart, so a keyword rule fires only on the messages you mean. Pick one of:
- Agent (human) — a reply written by someone on your team. Replies your team sends from the WhatsApp Business app on their phone count as Agent (human) too.
- Bot — an outgoing message that no person on your team wrote, such as your AI agent’s replies.
- Contact — a message from the customer.
Combine it with other conditions such as Message Contains or Inbox. For example, add a label or send an email to your team whenever one of your agents replies “appointment confirmed”, without the rule firing on your AI agent’s own messages.
The Message Sender condition is only available on the Message Created event.
Matching words in a message
The Message Contains condition takes a list of words or phrases. Type one and press Enter (or a comma) to add it, and add as many as you need. The rule matches when the message contains any of them.
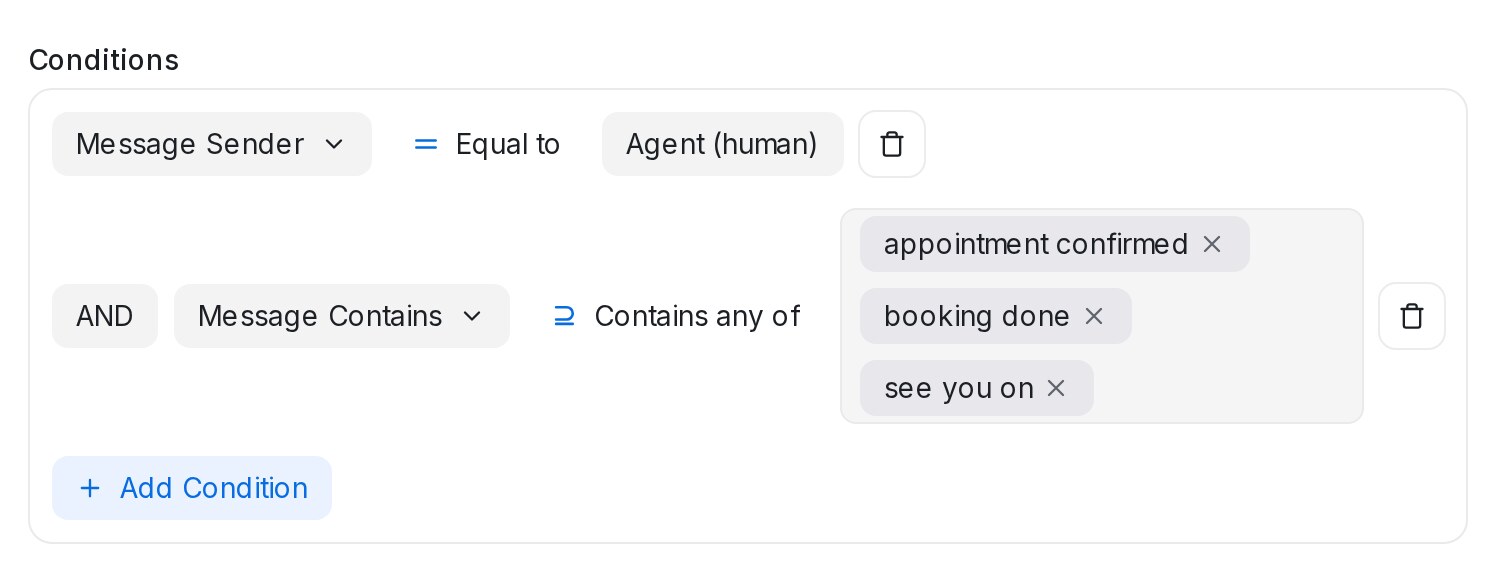
- Under Conditions, pick Message Contains. The operator starts on Contains any of.
- Type a word or phrase and press Enter. Repeat for each one; click the × on a chip to remove it.
- Choose another operator when you need it: Contains none of matches only when none of the words appears; Is any of and Is none of compare the whole message with each entry, ignoring letter case.
A message that contains several of the words runs the rule’s actions once. Capitalisation never matters, and each word matches inside longer text too — “booking done” also matches “Booking done, see you Tuesday”.
Chaining rules with a label
A label added by one rule can set off another rule. For example, one rule labels conversations that mention a certain product, and a second rule that watches for that label applies a message sequence or assigns a team.
- Create the first rule with the Add a Label action.
- Create a second rule with the Event set to Attribute Changed.
- Under Conditions, choose Labels → Label added and pick the same label.
- Add the follow-up action, such as Apply Message Sequence or Assign a Team, and click Create.
Good to know:
- Works with both Label added and Label removed.
- Labels added or removed by hand set these rules off too.
- Labels added by a contact import set these rules off only when Also add the labels to each contact’s latest conversation is ticked, because rules watch the conversation’s labels. See Creating and importing contacts.
- One step per chain: a rule set off by another rule’s label does not set off further rules, so two rules can never loop each other.
Filling AI attributes from another attribute
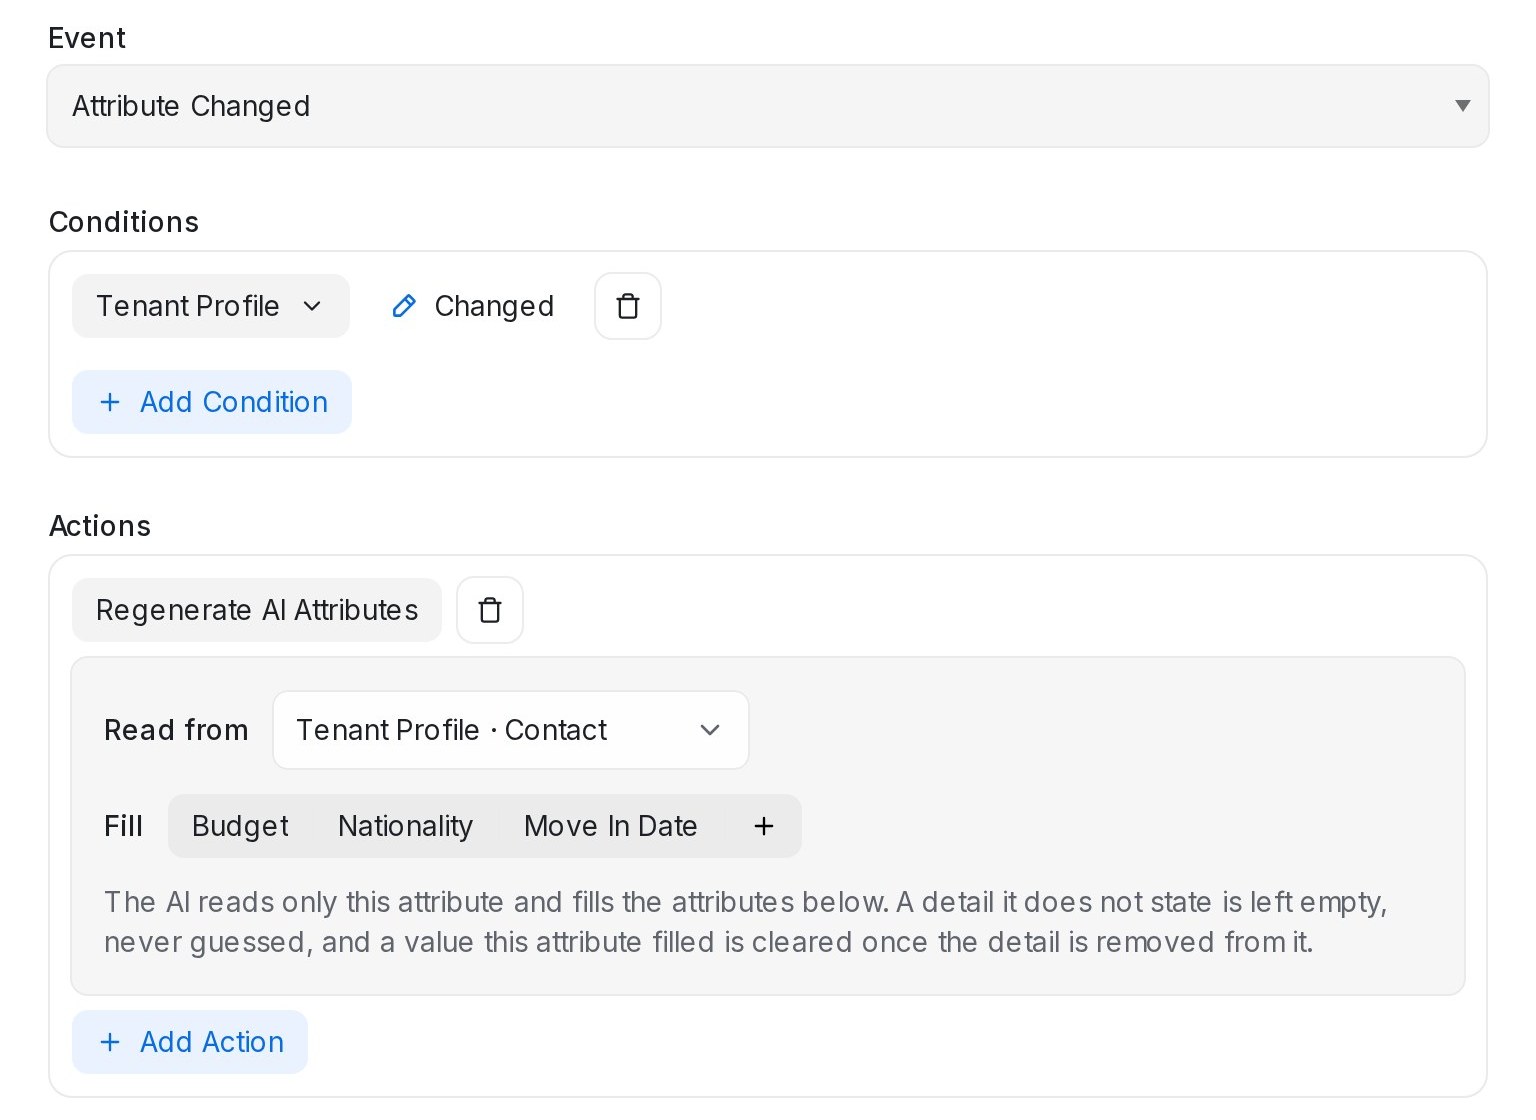
A rule can fill your AI attributes from a note your team keeps, such as a Tenant Profile contact attribute, instead of from the chat.
- Create a rule with the Event set to Attribute Changed.
- Under Conditions, pick the attribute your team writes in. The operator starts on Changed, which needs no value: the rule runs whenever the attribute is saved with something different.
- Under Actions, pick Regenerate AI Attributes.
- In Read from, choose that attribute. Only text attributes are listed.
- In Fill, pick the AI attributes to fill, then click Create.
Good to know:
- When the attribute is a contact attribute, the rule runs on the contact’s latest conversation. A contact with no conversation is skipped.
- A detail the attribute does not state is left empty, never guessed. When a detail is removed from the attribute, the value it filled is cleared.
- Values your team typed by hand or the chat filled are kept unless the attribute states something newer.
- With nothing picked in Fill, every AI attribute is filled. Read from starts on The conversation, so existing rules keep working as before.
- Values the AI writes do not set off rules again.
Pausing AI attributes for one conversation
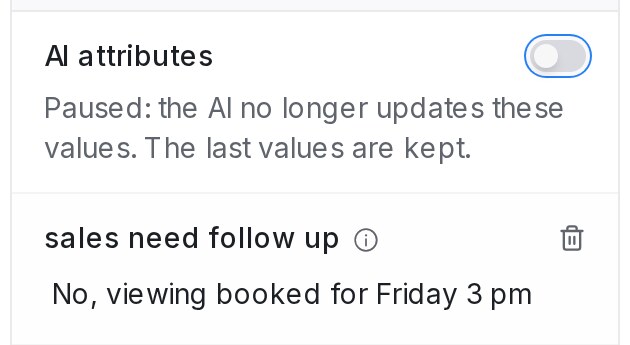
Once a lead has booked or bought, you may not need the AI to keep updating their summary and other AI attributes. Each conversation has its own switch.
- Open the conversation and expand Conversation Information in the right panel.
- Turn off AI attributes. The row reads Paused: the AI no longer updates these values. The last values are kept.
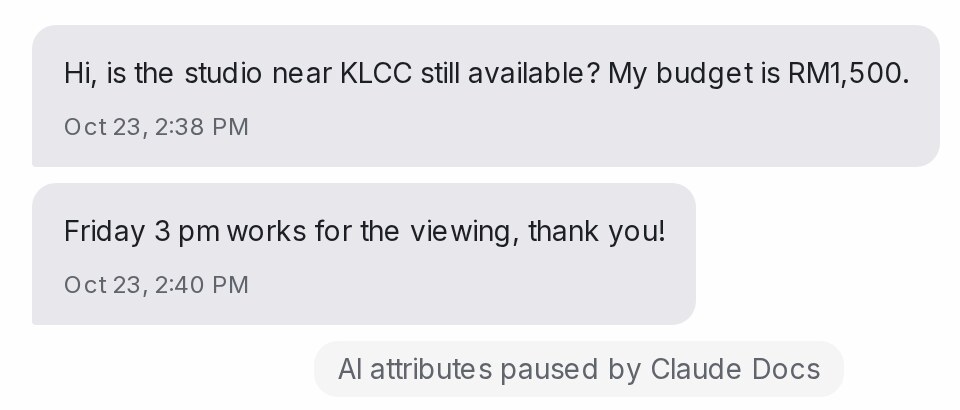
While the switch is off:
- New messages and rules no longer refresh the AI attributes, including an AI-filled Name, Email or Phone number, so no AI usage is spent on refreshing them.
- The conversation shows who paused it, and teammates see the switch change straight away.
- Regenerate on a row of the Flow Submissions report still refreshes it when you ask, and the conversation notes it. Regenerate AI Columns skips paused conversations and says how many.
Turn the switch back on to resume. For a conversation your flow agent handled, the values refresh once from the latest messages. Every conversation starts with the switch on, and the switch shows only when your account has an AI attribute.
Pausing AI attributes with a rule
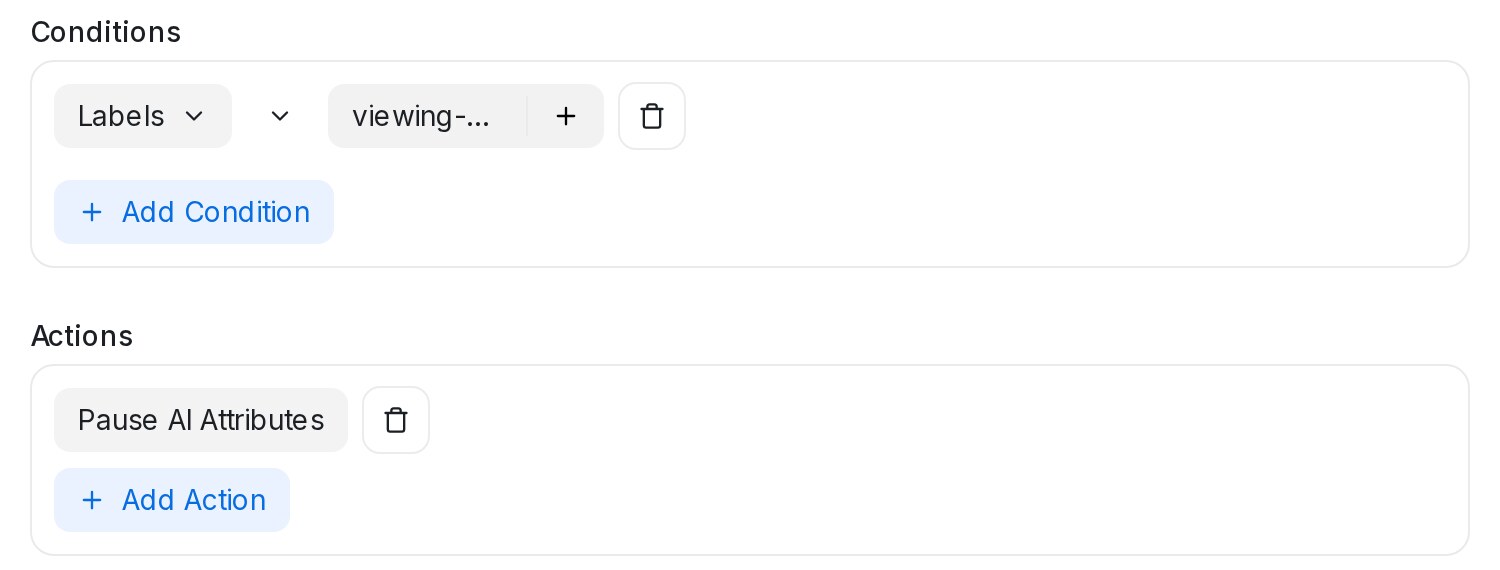
A rule can pause them for you, for example when an agent adds a viewing-booked label.
- Create a rule with the Event set to Conversation Updated.
- Under Conditions, pick Labels, the operator Label added and your label.
- Under Actions, pick Pause AI Attributes, then click Create.
Resume AI Attributes turns them back on. The conversation shows that the automation paused or resumed them. While a conversation is paused, a Regenerate AI Attributes action in any rule is skipped for it, and the rule’s other actions still run.
Sending data to your own systems
The Send Webhook Event action sends the conversation’s details to a URL of your choice — a CRM, an API or an automation tool — with the method and headers that endpoint needs. See Integrations overview for how to set it up and test it. If the receiving system refuses a request, the account’s administrators get an email listing the leads that failed; see When a request fails on that page.
More you can do with rules
Automation rules can also send messages for you — in the same conversation or through another inbox like email or WhatsApp. See Sending automated messages with Automation.
The Sync lead to Google Sheets action writes the conversation’s lead row to your spreadsheet when the rule runs. See Connecting Google Sheets.
Rules can also keep your calendar in step when an agent reschedules or cancels an appointment in chat. See Updating a booking when an agent reschedules.
Letting AI fill a contact’s name, email and phone
The Contact tab of Settings → Custom Attributes starts with three System attributes: Name, Email and Phone number. They are the contact’s own fields, so they can’t be deleted or renamed; only their AI fill can be changed.
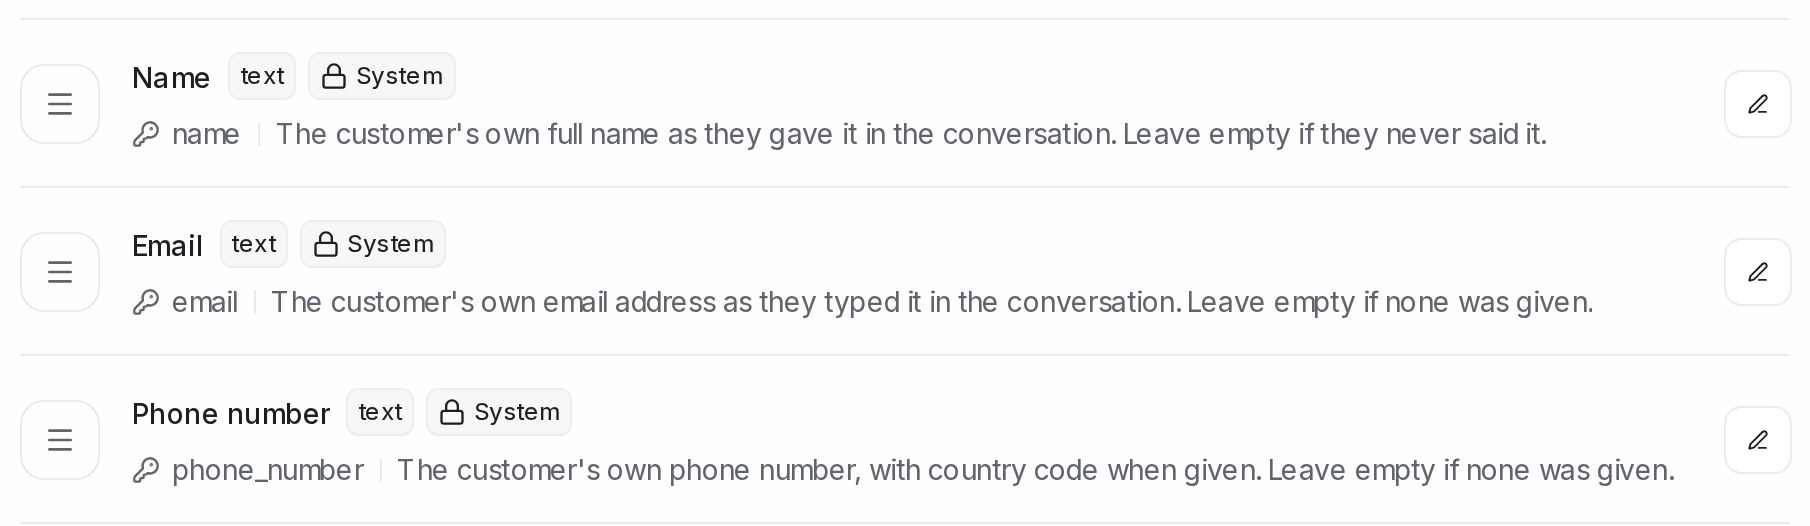
With AI on, the AI reads the conversations your flow agent handled and fills them in:
- Name — filled only when the contact has no name, only a phone number as their name, or the made-up name a website visitor gets before giving theirs. A name already set is never changed.
- Email and Phone number — never changed directly. A new value waits on the contact for your team to approve or dismiss — see Custom attributes and notes.
- A phone number is never suggested on WhatsApp or SMS inboxes, where the number already identifies the customer.
Turning on AI for a System attribute
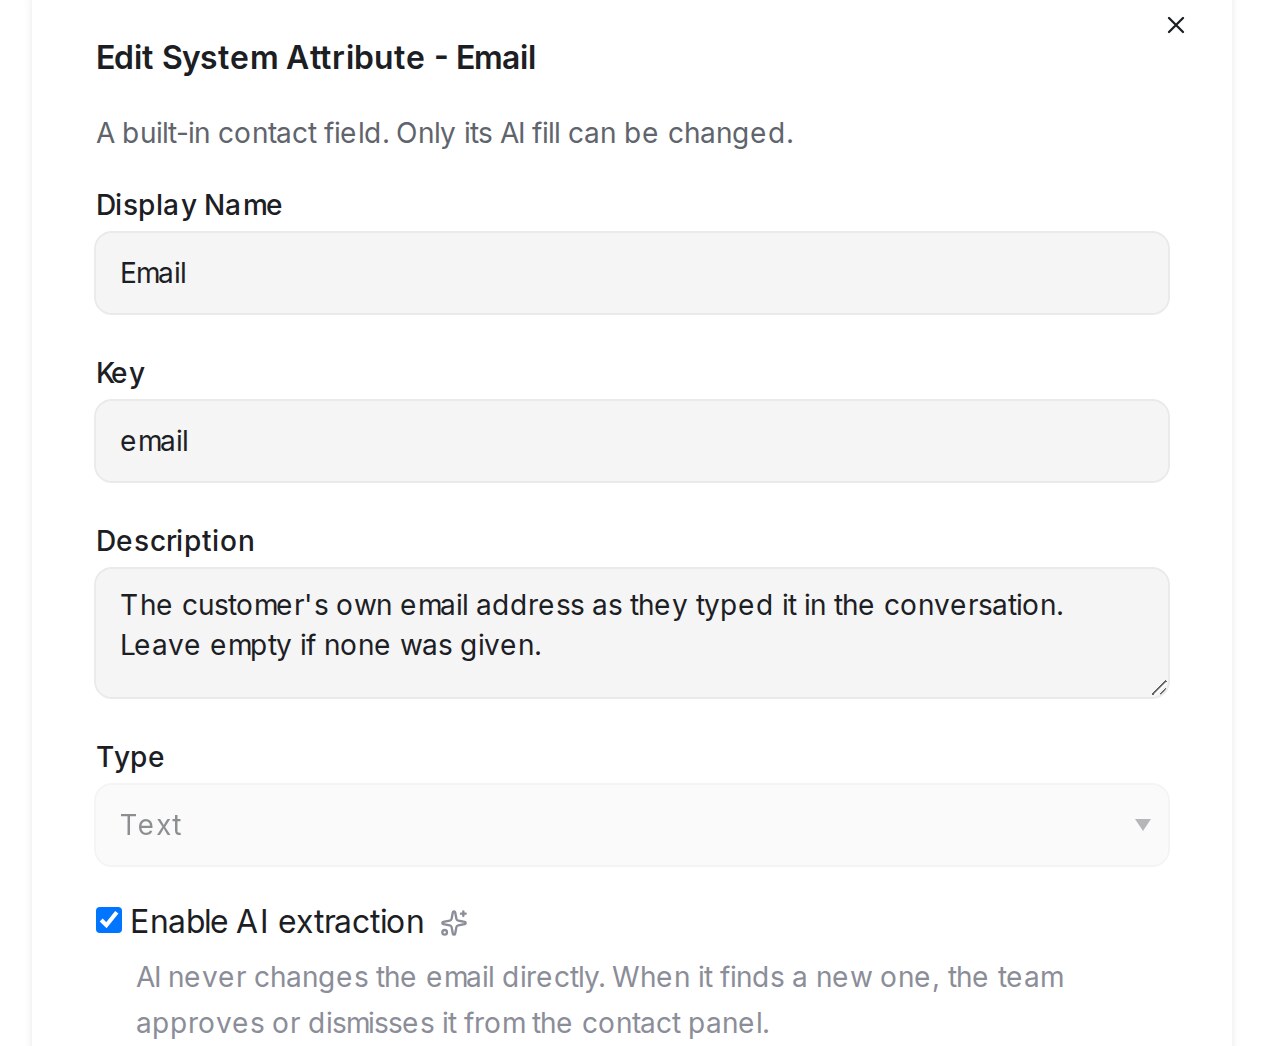
- Open Settings → Custom Attributes and choose the Contact tab.
- Click the edit button on Name, Email or Phone number.
- Tick Enable AI extraction.
- Optionally adjust the Description — the instructions the AI follows — and When to run, the minutes of quiet after the last message before the field is filled.
- Click Update.
AI attributes need an AI provider connected under Settings → Integrations → AI Providers.
Related
- Testing and connecting an agent — see which rules ran during a Playground test.
- Sending automated messages with Automation
- Reply SLA
- Integrations overview
- Account (general) settings — the workspace tester list
- Connecting Google Sheets
- Filter conditions and operators
- Custom attributes and notes