
The designer has two ways to build, side by side: describe what you want in plain language on the left — “Ask for name, email, and company. If the email is from gmail, decline politely. Otherwise hand off to sales.” — and AI updates the flow for you; or edit the canvas directly on the right, block by block.
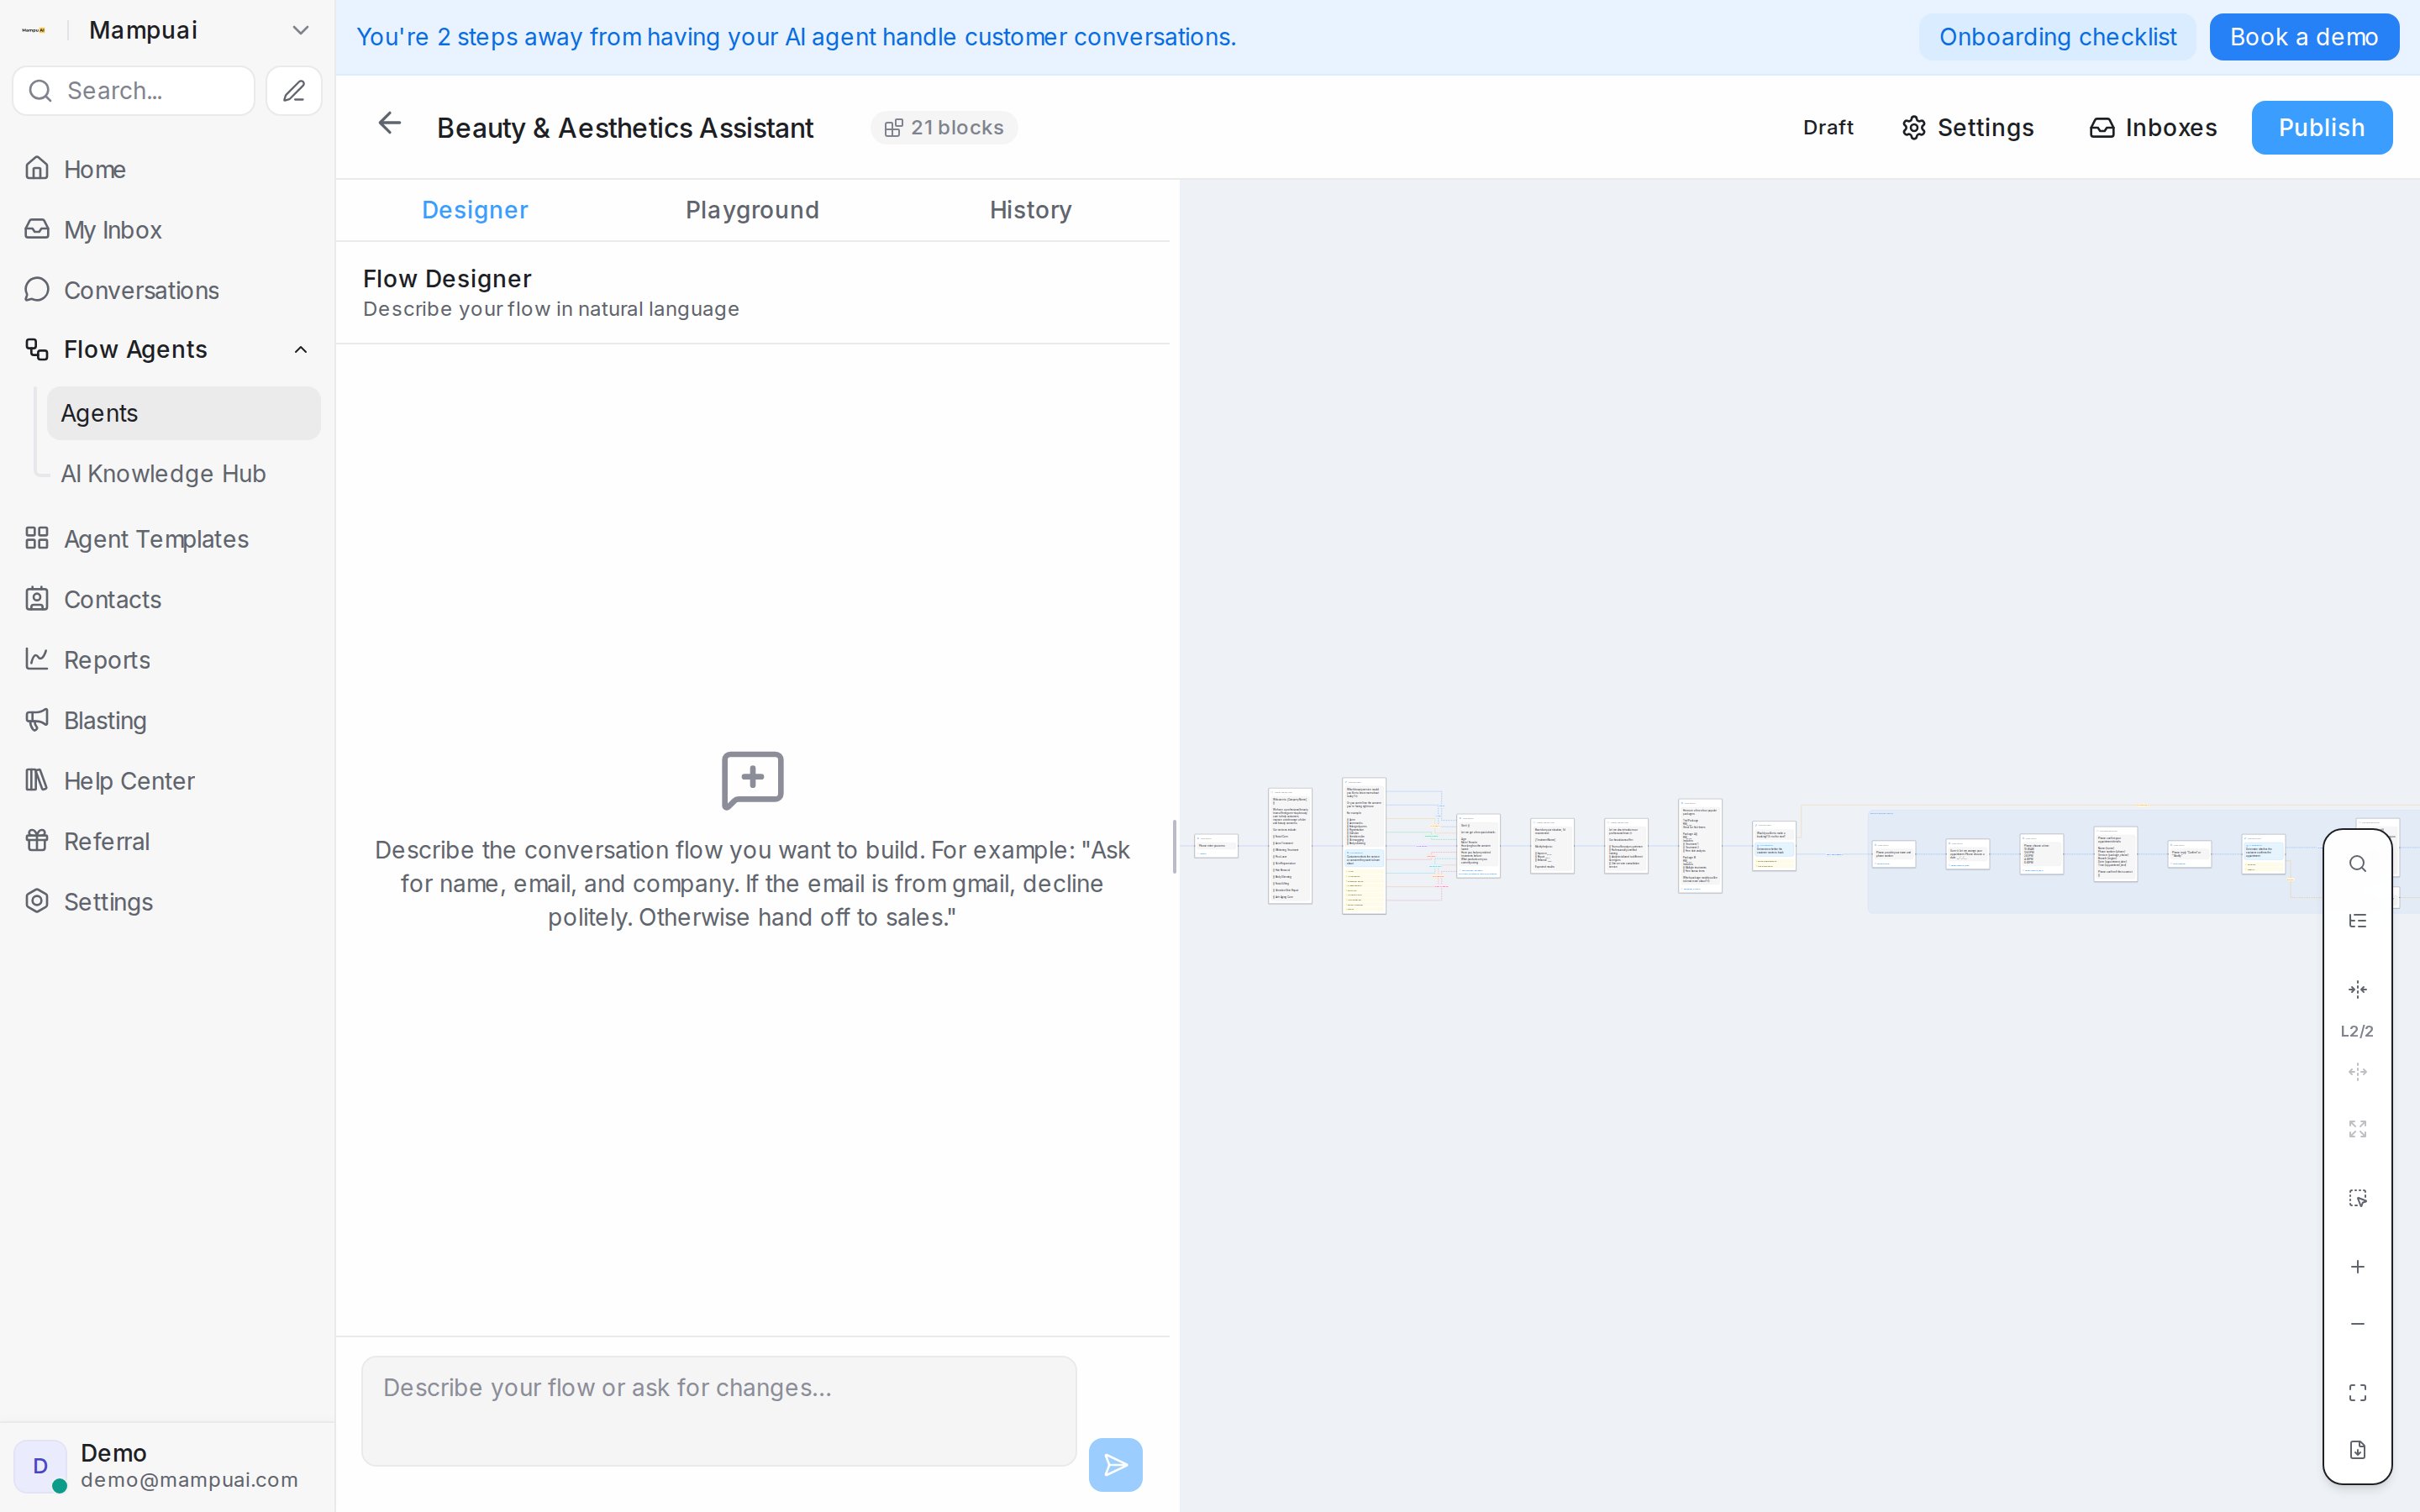
Watch the walkthrough
The building blocks
- Send message — say something, with attachments if needed.
- Collect — ask a question and capture the answer (name, email, budget…) for later steps.
- Condition — branch the conversation based on what the customer says.
- Knowledge query — answer from your AI Knowledge.
- Tool steps — use live data: offer real open time slots from a Calendar and book the chosen one, or recommend real products from your catalogue.
- AI task — compute something silently (e.g. an instalment estimate) and save the result for later blocks.
- End — finish the conversation, or hand off to a human agent.
Values collected earlier can be reused anywhere with placeholders like {name} or {email}.
Use what you already know about the customer
Your contact records are available to the flow as well. Anywhere you can type a placeholder, {contact.name}, {contact.phone} and {contact.email} fill in the customer’s saved details, and {contact.<field>} works for any custom contact attribute you have defined — {contact.full_address}, for example. A field with no value on the record is left out of the message.
A Condition can check the record too. Describe the check in plain words and name the field: “If {contact.phone} is present, route to has_phone; otherwise route to no_phone.” The agent sees whether that field is filled in and takes the matching branch, so a customer whose number you already have is never asked for it again, while a customer without one still is. Inside a condition an empty field reads as “(not set)”. Conditions that do not mention a contact field behave exactly as before.
To try this in the Playground, set a Scenario with the contact details you want to test — placeholders and conditions then use them just as they would in a live conversation (see Testing and connecting an agent).
Show a route only to the right customers
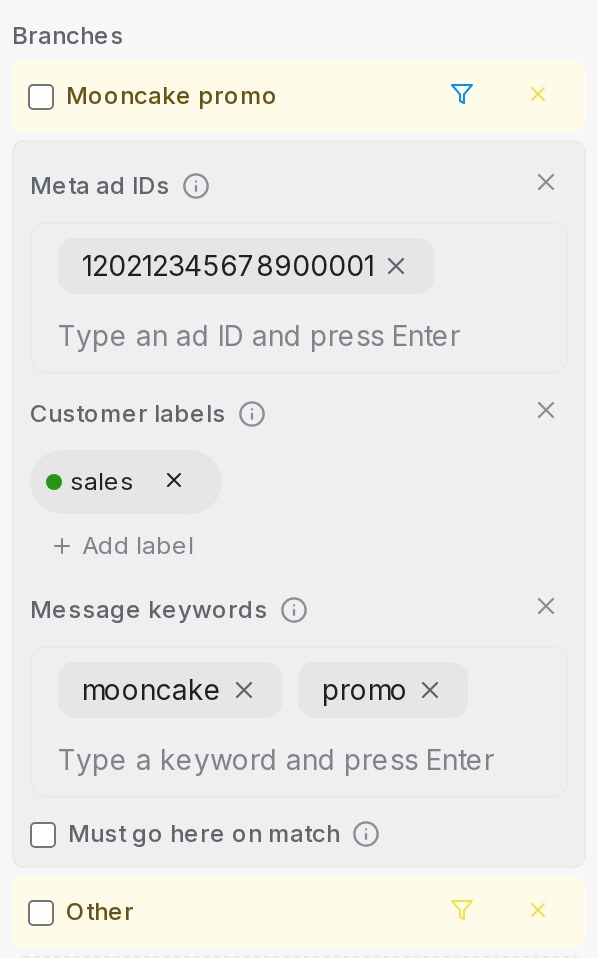
A condition block can decide who is offered each branch, and who goes straight down it. Click the filter icon on a branch, press Add condition, and pick what should apply:
- Meta ad IDs — the route is only offered to customers who arrived through one of the listed Click-to-Message ads.
- Customer labels — the route is only offered when the conversation or the contact carries at least one of the chosen labels.
- Message keywords — when the customer’s latest message contains any of the words or phrases you list, the conversation goes straight down this route and the question is skipped. Matching ignores letter case, and the keyword can sit anywhere in the message — “Is the PROMO still on?” matches the keyword promo.
Mix conditions freely. Ad IDs and labels both have to match before a customer sees the route; add keywords on top and the customer also has to mention one of them before being sent straight down it. Under an ad IDs or labels condition, tick Must go here on match to skip the question entirely and send every matching customer straight down the branch. Hover the info icon beside each condition for a reminder of how it works.
- Branches without conditions stay visible to every customer — keep at least one open branch as the everyday path.
- Branches with a rule show a small badge on the canvas: a filter for gated routes, a fast-forward arrow when matching customers skip the question.
- Customers already inside a route always get to finish it, even if the rule changes mid-conversation.
- The Playground shows the full flow and applies keyword conditions only, so you can test every route while building — type a keyword to see its shortcut fire. To try ad and label conditions as a specific customer, set a Scenario in the Playground — see Testing and connecting an agent.
Focus the agent on the right FAQs
Once your AI Knowledge entries carry categories, any block can narrow what the agent answers from. Open the block’s Actions → FAQ category scope, choose Restrict to selected categories, and pick the categories that belong to this part of the flow — from that step onward the agent only answers questions from those FAQs. Tick Include general FAQs to also allow entries that have no category.
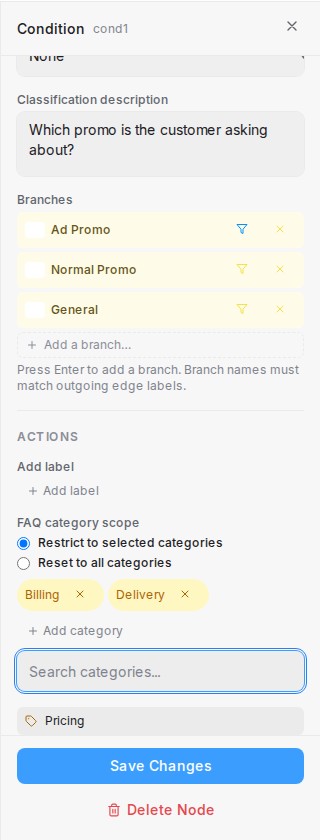
- The scope stays active until another block changes it — add a scope action set to Reset to all categories where the conversation opens back up.
- Scoped blocks show an amber FAQ badge on the canvas, and every scope change appears as a note in the conversation (and in the playground while testing), so your team can always see what the agent is drawing from.
- Categories are picked from the ones already on your entries — if a category is later removed from every entry, the flow asks you to update the scope before it can be saved or published.
The handoff message
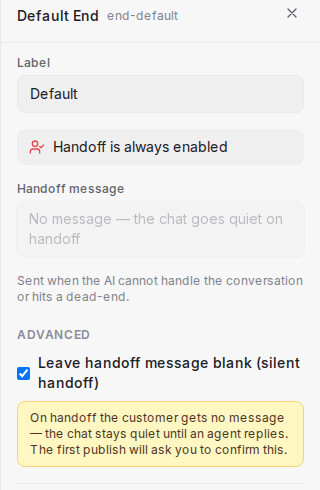
Every flow has a default End step that hands the conversation to your team, sending a short handoff message (e.g. “Let me connect you with a team member.”) whenever the agent can’t help further.
Prefer a quiet handover? Tick Leave handoff message blank (silent handoff) on the default End step — the message field clears, and customers get no automated line when the agent steps back; the next thing they see is your teammate’s reply. Because the chat stays quiet until someone answers, the first time you publish the agent you’re shown exactly what customers will experience and asked to confirm. Your name and the date are recorded on the step, so the team always knows who approved it. Typing a handoff message again switches the agent back to announcing the handover.
Every designer change creates a snapshot — open the History tab to restore any earlier version. You can also download the canvas as a PDF to share the flow with your team.
Save as you go, and use the playground to try the flow as if you were the customer.