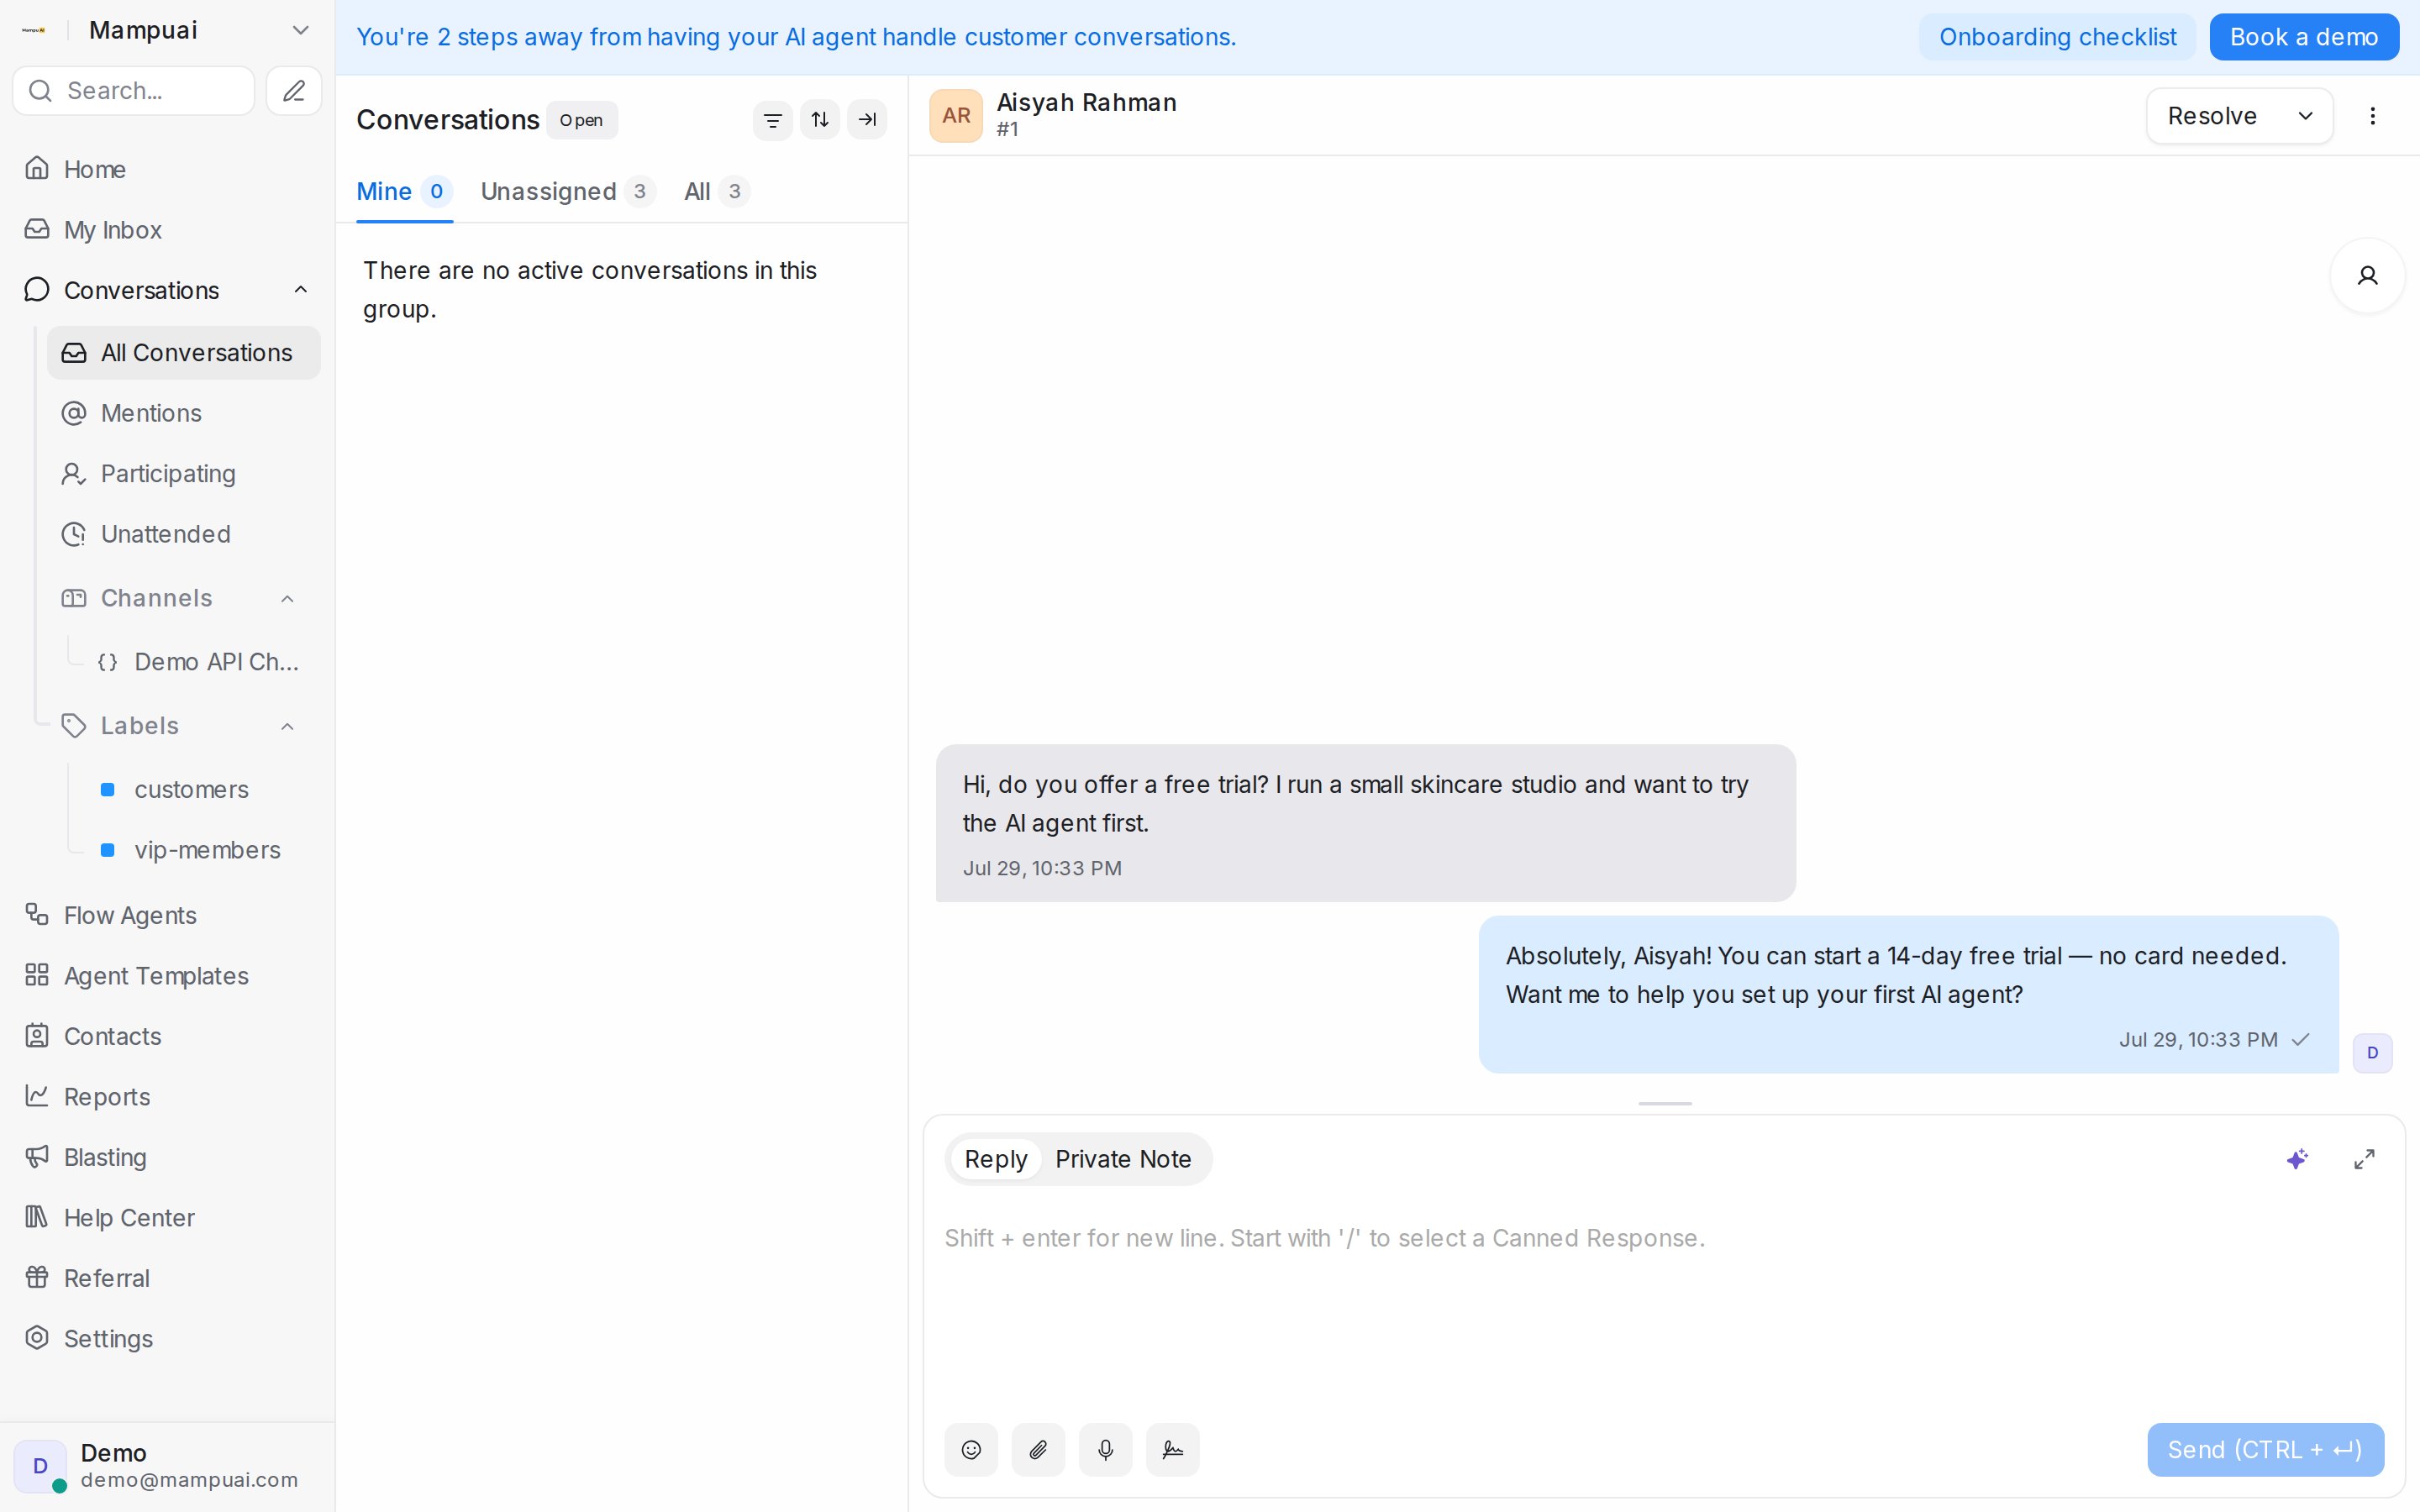
Three controls keep the queue in order: a conversation’s status says whether it still needs work, its priority says how urgent it is, and labels say what it is about. All three are set from the conversation header, the details panel, or by right-clicking the conversation in the list.
Watch the walkthrough
Status
Every conversation is in one of five states, and the list shows one state at a time (pick it under Status behind the sort icon above the list):
- Open: needs attention from your team.
- Pending: parked on your side, for example while you check something with a colleague.
- Snoozed: hidden until a time you chose, or until the customer writes again.
- Resolved: done. A resolved conversation reopens by itself if the customer sends a new message.
- Spam: out of the way. Use it for messages you never want to see in Open.
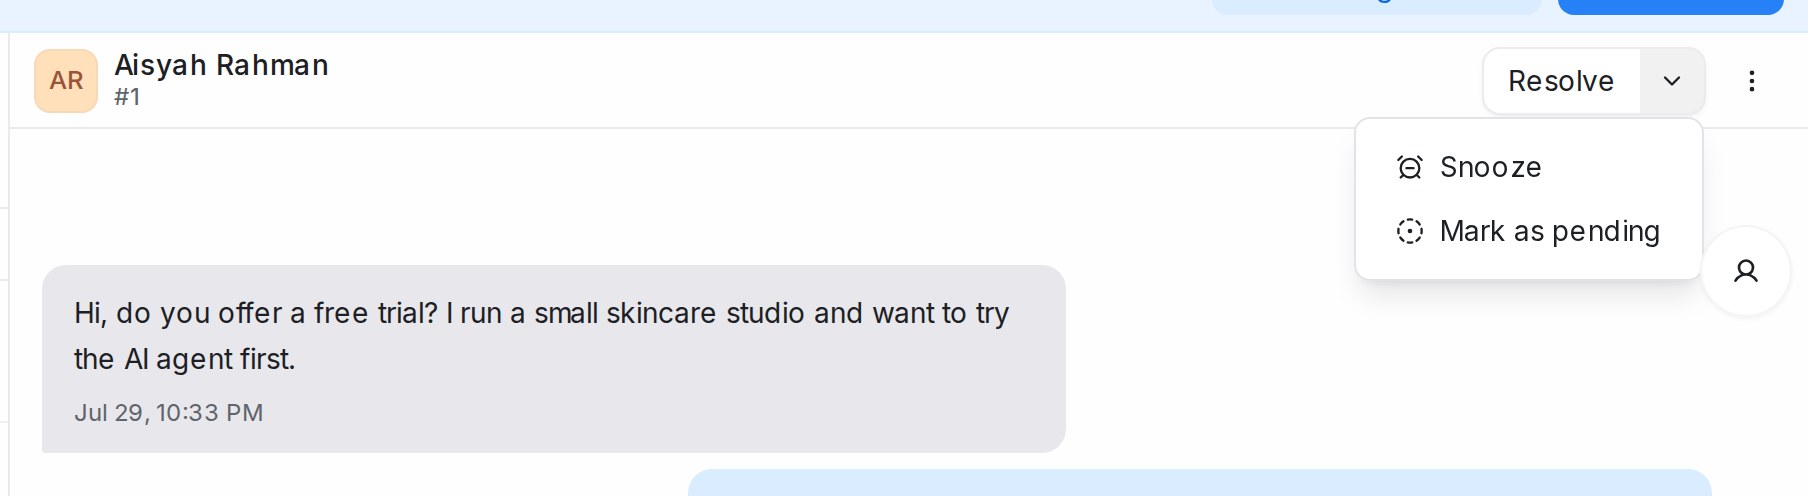
To change status, use the button at the top right of the conversation:
- Resolve closes it. The button turns into Reopen on a resolved or pending chat.
- The arrow next to the button opens Mark as pending and Snooze.
- Under Snooze until, pick Next reply, Tomorrow or Next week, or type when you want it back, for example in 1 hour, and click Snooze.
While a conversation is snoozed the header reads Snoozed until with the time, or Snoozed until next reply. You can do the same from the list: right-click a conversation for Mark as resolved, Reopen conversation, Mark as pending, Mark as spam and Snooze, or tick several conversations and use Change status in the bar at the bottom of the list.
Conversations resolve on their own after a period of inactivity when that is switched on under Settings → General, and automation rules can resolve or reopen them for you. See Labels, attributes and automation.
Blocking a contact
When someone should not reach your team at all, open the More actions menu in the conversation header and choose Block Contact. Their open conversations resolve on their own and new messages from them stay out of your queue. Choose Unblock Contact from the same menu to let them through again.
Priority
Priority is a flag your team sees on the conversation card: Urgent, High, Medium, Low or None. Set it under Conversation Actions in the details panel or by right-clicking the conversation and choosing Priority. Sort the list by Priority: Highest first to work the urgent ones first, and filter or automate on it like any other field.
Labels
Labels tag a conversation by topic, such as billing or complaint, so you can find all of them later.
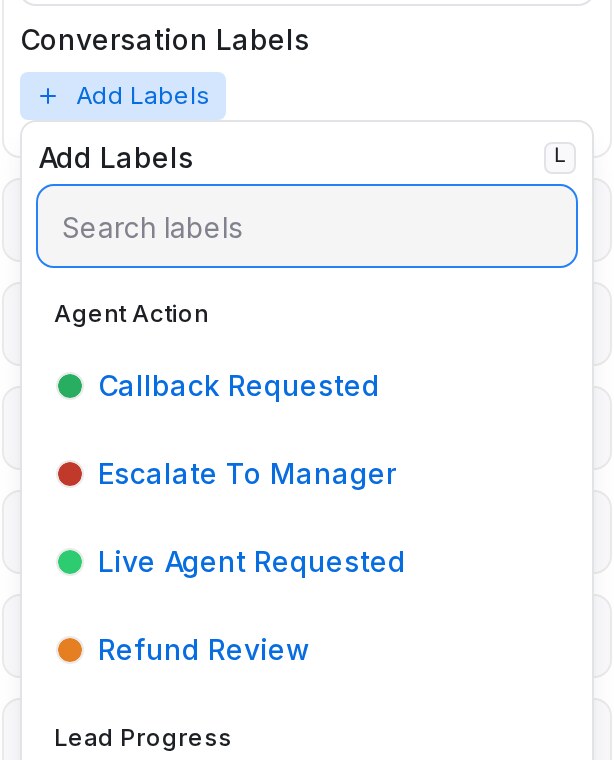
- In the details panel, under Conversation Actions, find Conversation Labels and click Add Labels. Tick the labels you want, or type a new name and choose Create new label.
- In the list, right-click a conversation and choose Assign label.
- For many at once, tick the conversations and use Assign labels or Remove labels in the bar at the bottom of the list.
Every label you create under Settings → Labels can also appear in the sidebar’s Labels group, which is a ready-made view of the conversations carrying it. Labels on the conversation are separate from labels on the contact; the contact’s own labels live on the contact page. On a Facebook inbox, a contact’s labels also stay in step with Meta Business Suite; see Connecting a Facebook inbox.
A label name starts with a letter or a number. After that it can use letters in any language, numbers, spaces, hyphens (-), underscores (_) and slashes (/), so names such as 24/7 Support or A/B test work. Commas and other punctuation can’t be used: a name with them isn’t accepted.
Grouping labels into categories
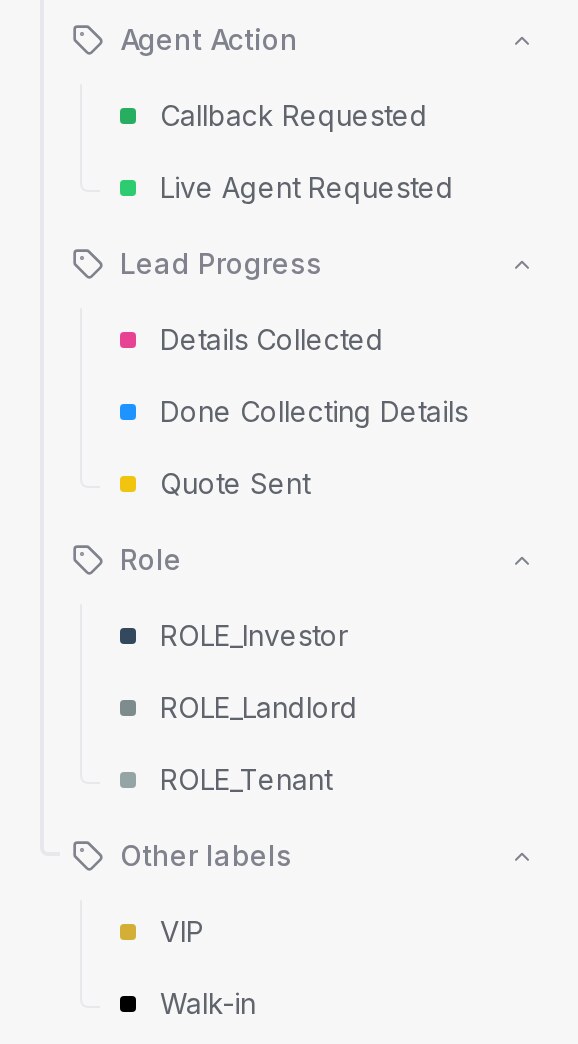
When a workspace has many labels, give each one a category so related labels sit together. A category is just a name you type on the label, such as Lead Progress, Role or Agent Action.
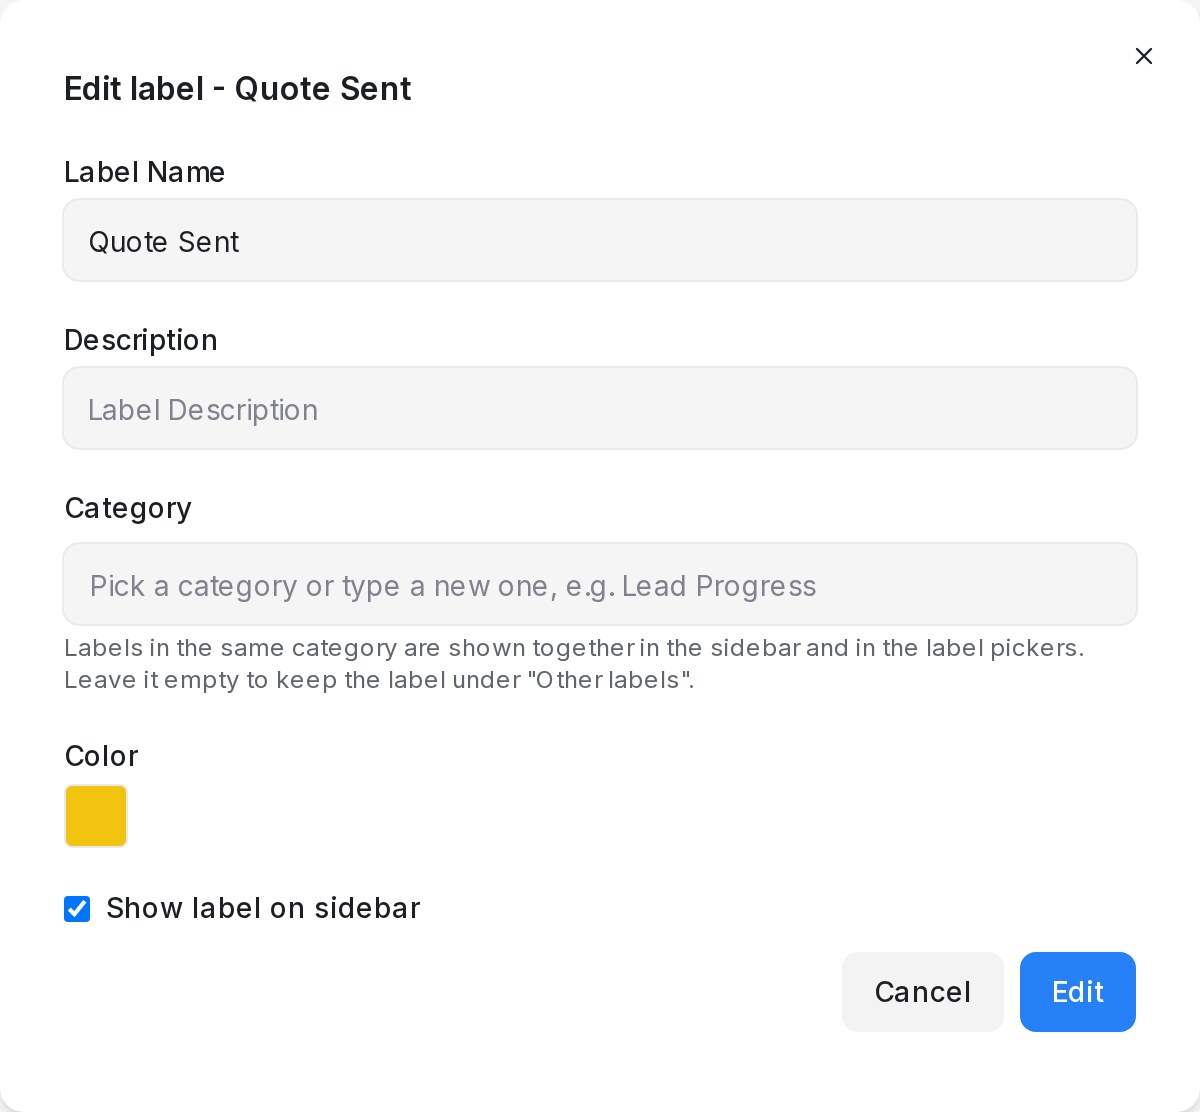
- Open Settings → Labels and click Add label, or the pencil on a label you already have.
- In Category, pick one of the names already in use or type a new one.
- Save. A label with no category stays under Other labels, and a name typed in a different letter case joins the existing category.
Finding labels by category
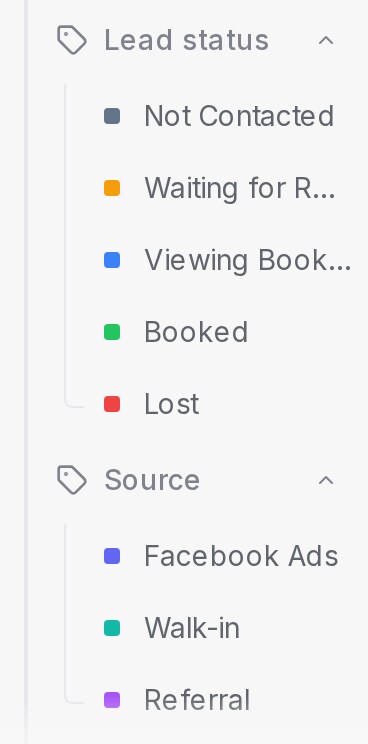
In the sidebar, each category becomes its own group under Conversations, and under Tagged with on the Contacts side, with the labels that have no category last under Other labels. Click a group’s chevron to collapse it; this browser remembers which groups you closed. The sort menu on a group applies to every label group. While an administrator’s custom order is on, the groups follow that order instead (see Putting labels in your own order below).
Wherever you pick labels, the list shows a heading per category: Add Labels on a conversation, + tag on a contact, the bar below the conversation list, the Labels filter and automation conditions and actions, and the flow designer’s Add label step. Type to search and only the groups with a match stay. A workspace with no categories sees one flat list, as before.
Putting labels in your own order
Lead-status labels read best in the order of your sales process, not A to Z. An administrator can set one order for the whole team.
- Open Settings → Labels and click Arrange labels.
- Turn on Use custom order.
- Drag the categories, and the labels inside each one, into place.
- Click Save order.
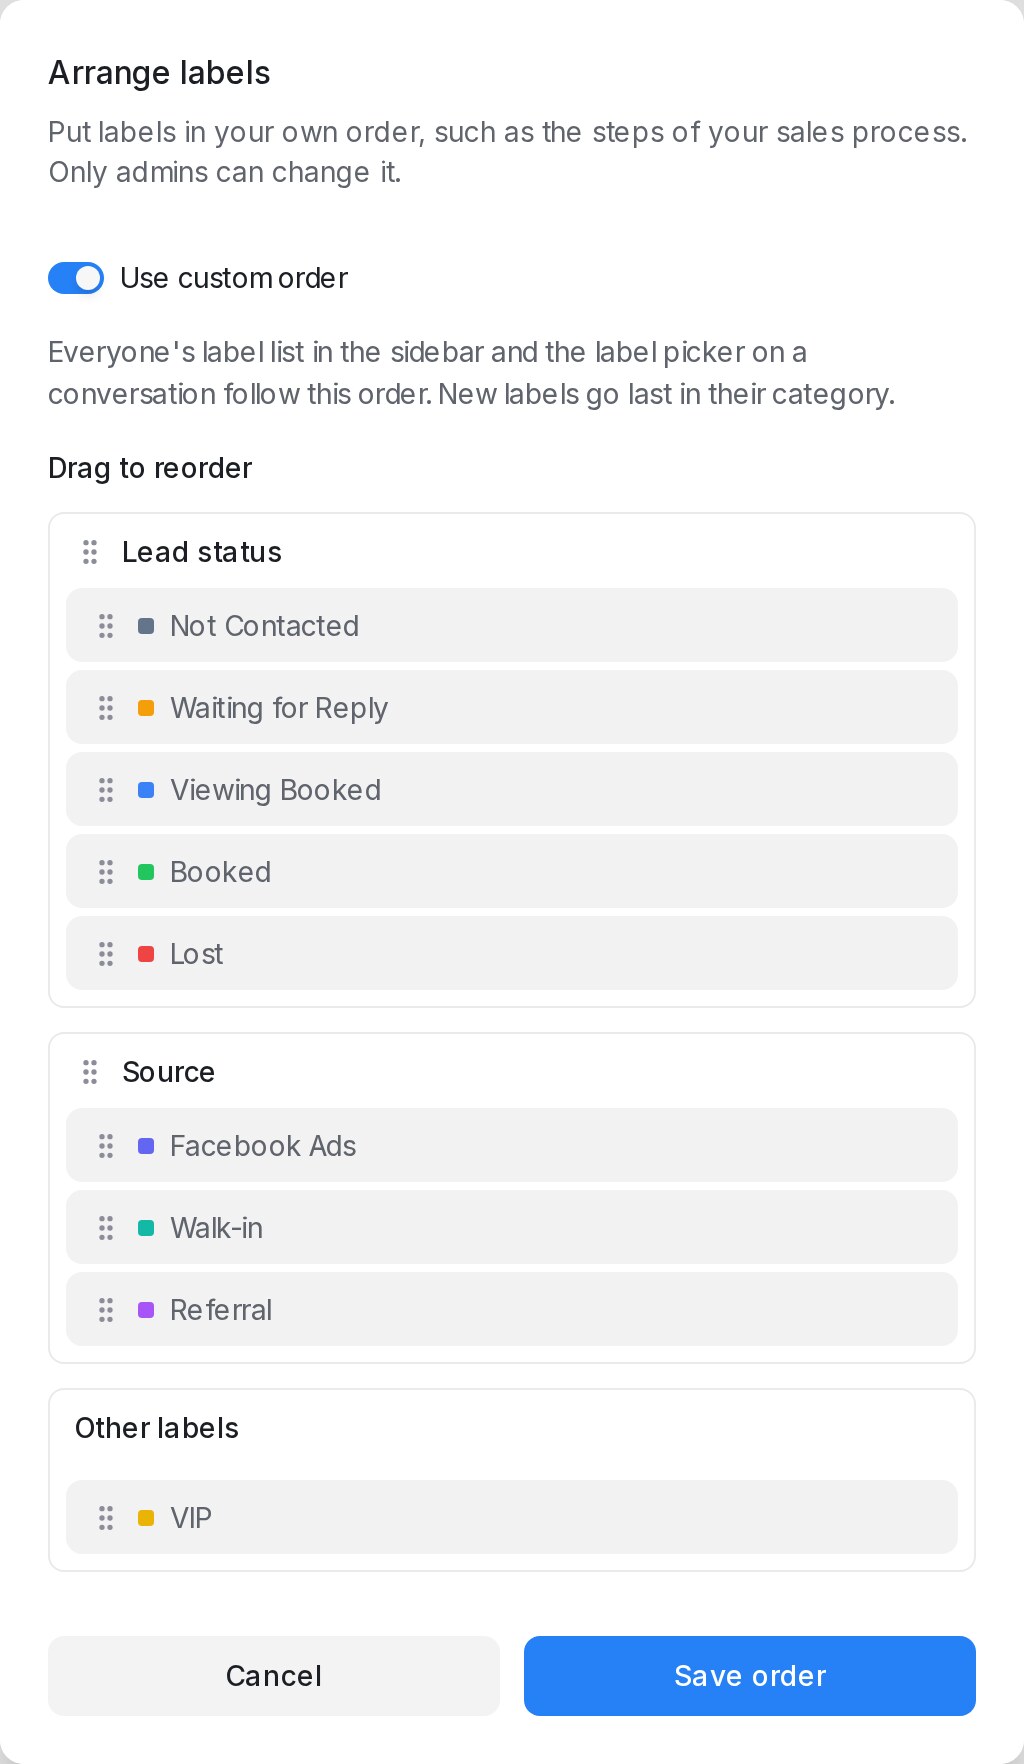
While it is on, everyone’s labels in the sidebar, the Add Labels picker on a conversation and the Assign label list when you right-click a conversation follow this order, and the sidebar’s label sort menu is hidden. A new label goes last in its category. Filters, reports, contacts and Settings → Labels itself stay A to Z.
Turn Use custom order off to go back to each person’s own sort. The saved order is kept for the next time you turn it on.