Under Settings → Account Settings you manage the basics of your workspace:
- Account name and site language.
- Incoming email domain and support email.
- Your Account ID, needed for API integrations.
- Testers — the people who can try flow agents, message sequences and automation rules before they go live.
Watch the walkthrough
Click Update settings to save your changes.
Choosing the dashboard language
The dashboard is available in English, Chinese and Bahasa Melayu (ms), among other languages. You can set a language for the whole account, and each team member can pick their own.
For the whole account
- Open Settings → Account Settings.
- Under Site language, choose a language — for example Bahasa Melayu (ms).
- Click Update settings.
Team members who haven’t picked a personal language follow the account’s Site language. The customer chat widget and the emails the system sends follow the account’s language too.
Just for you
- Open Profile Settings.
- Under Preferred Language, choose the language you want. It applies straight away and changes only your own screens.
To follow the account’s language again, choose Use account default under Preferred Language.
Workspace testers
The Testers section on Settings → Account Settings holds one list for the whole workspace: the people who can try things before they go live. A flow agent published as Testers only, and a message sequence or automation rule switched to Testers only, work for these people and nobody else.
- Under Testers, type one entry per line: a phone number, an email address, a WhatsApp username or a WhatsApp LID.
- Click Save testers.
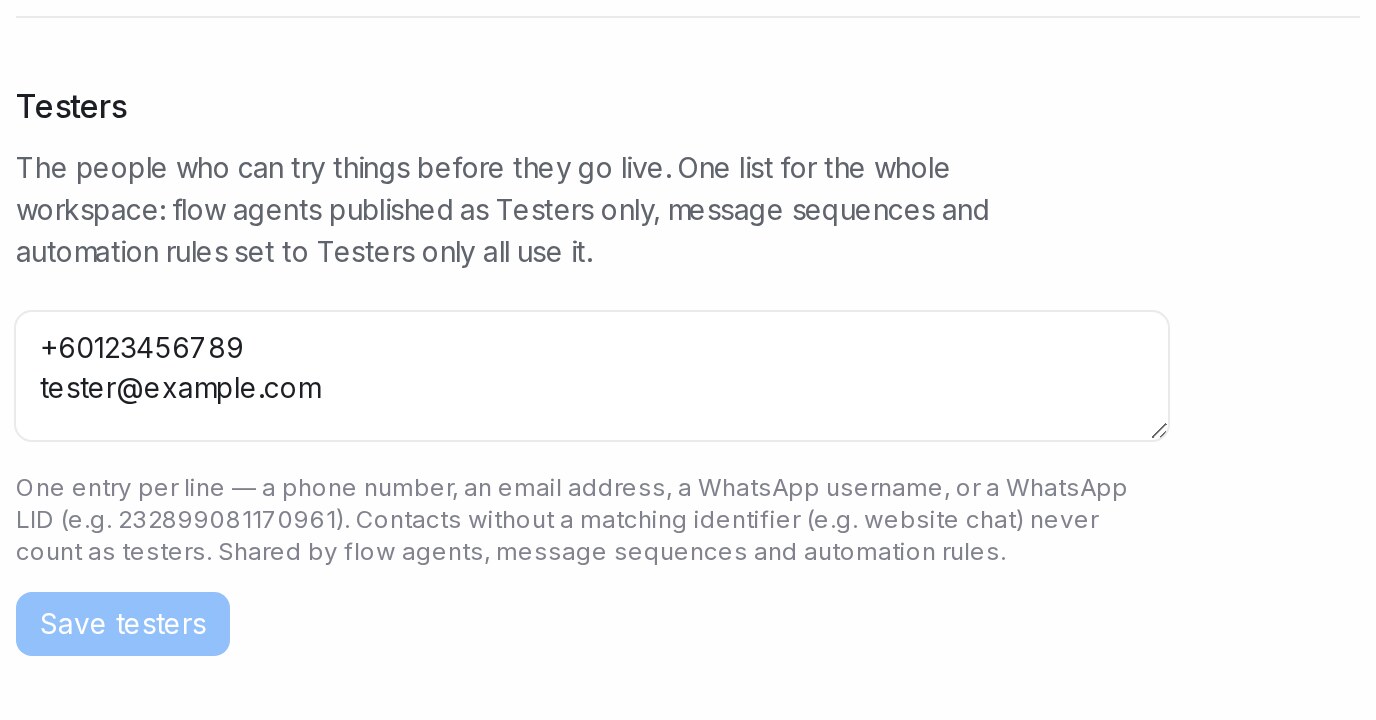
- A customer counts as a tester when their contact’s phone number, email, WhatsApp username or LID matches an entry. Contacts with none of those, such as a website chat visitor, never count.
- The same list opens in the dialog when you switch an agent, a sequence or a rule to Testers only, so you can add a tester there too.
- Changing the list changes it for every agent, sequence and rule at once.
Where to use it: Testing and connecting an agent, Message Sequences and Labels, attributes and automation.
Delete your account
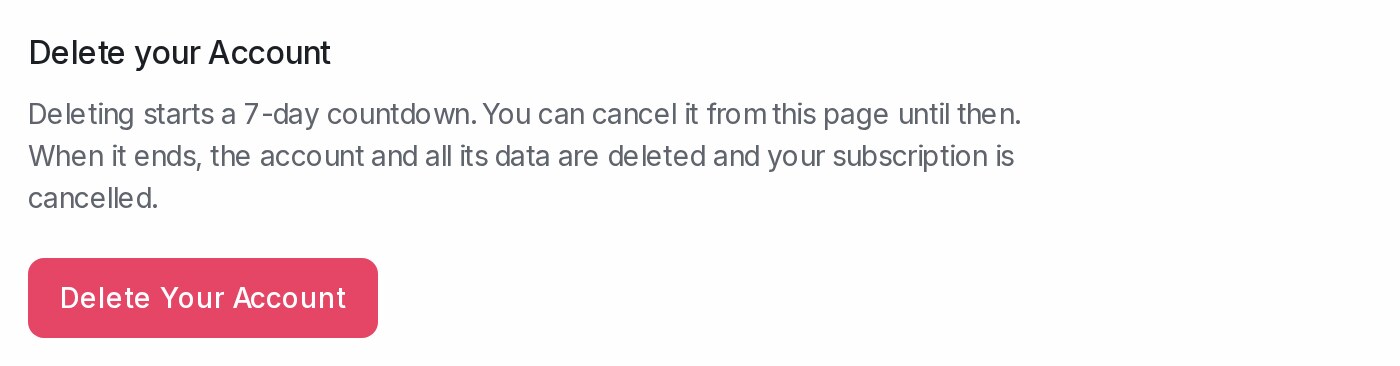
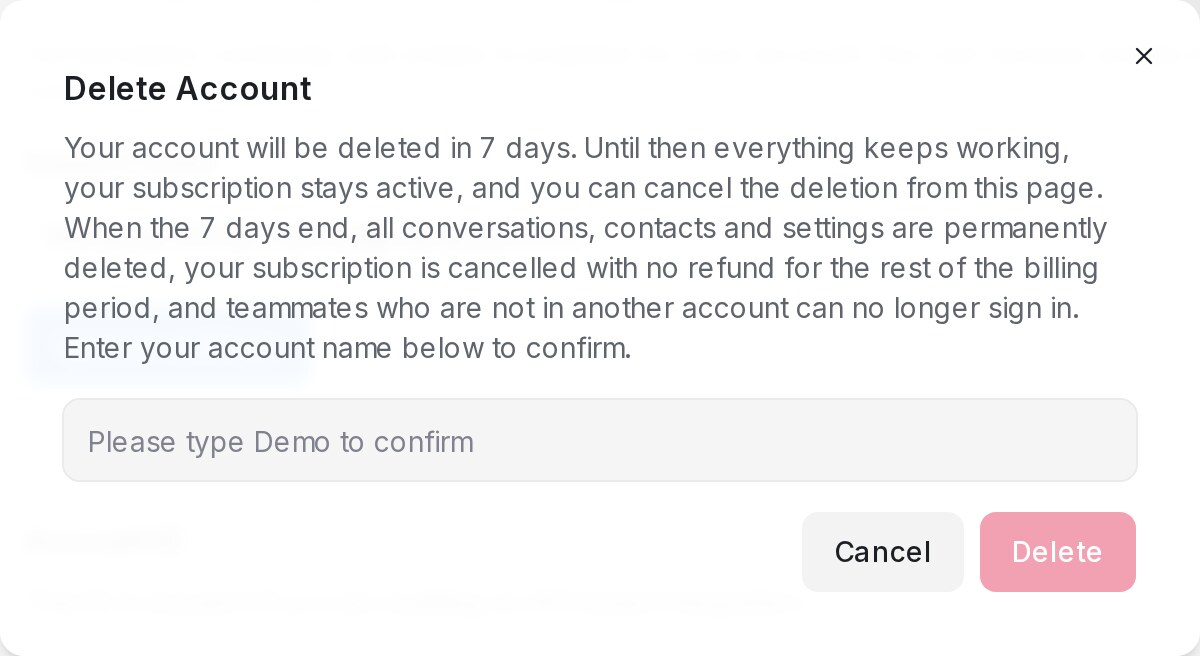
An administrator can delete the whole account from Settings → Account Settings. Deleting starts a 7-day countdown, so nothing is lost straight away.
- Scroll to Delete your Account at the bottom of the page and click Delete Your Account.
- Type your account name in the box to confirm.
- Click Delete. You see Account scheduled for deletion in 7 days.
Until the 7 days end, everything keeps working and your subscription stays active. When they end:
- All conversations, contacts and settings are permanently deleted.
- Your subscription is cancelled, with no refund for the rest of the billing period.
- Teammates who are not in another account can no longer sign in.
Cancel a scheduled deletion
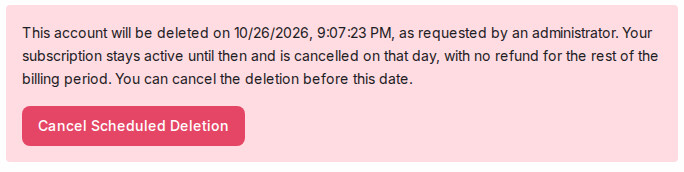
While the countdown runs, a red box at the bottom of Settings → Account Settings shows the day the account will be deleted.
To keep the account, click Cancel Scheduled Deletion before that day. The account and your subscription carry on as before.