
The flow designer opens as a chat. You tell it what your customers usually ask for, it asks a few questions, shows you a plan, and builds the conversation for you. Every reply is in plain words: what your agent now does for customers, not a list of steps. The canvas is still there when you want to look closer or edit a step by hand.
Describe your bot
- Open Flow Agents → Agents and open an agent, or create a new one.
- Under Let’s build your bot, type what the agent should do in the box that says Describe your bot or ask for a change…, or pick one of the examples under Try one of these.
- Say it the way you would to a new team member: what you sell, what customers usually ask, what details you need from them, and when your team should take over.
The designer also reads your AI Knowledge business profile and FAQs, so it doesn’t ask for what it already knows.
Answer a few questions
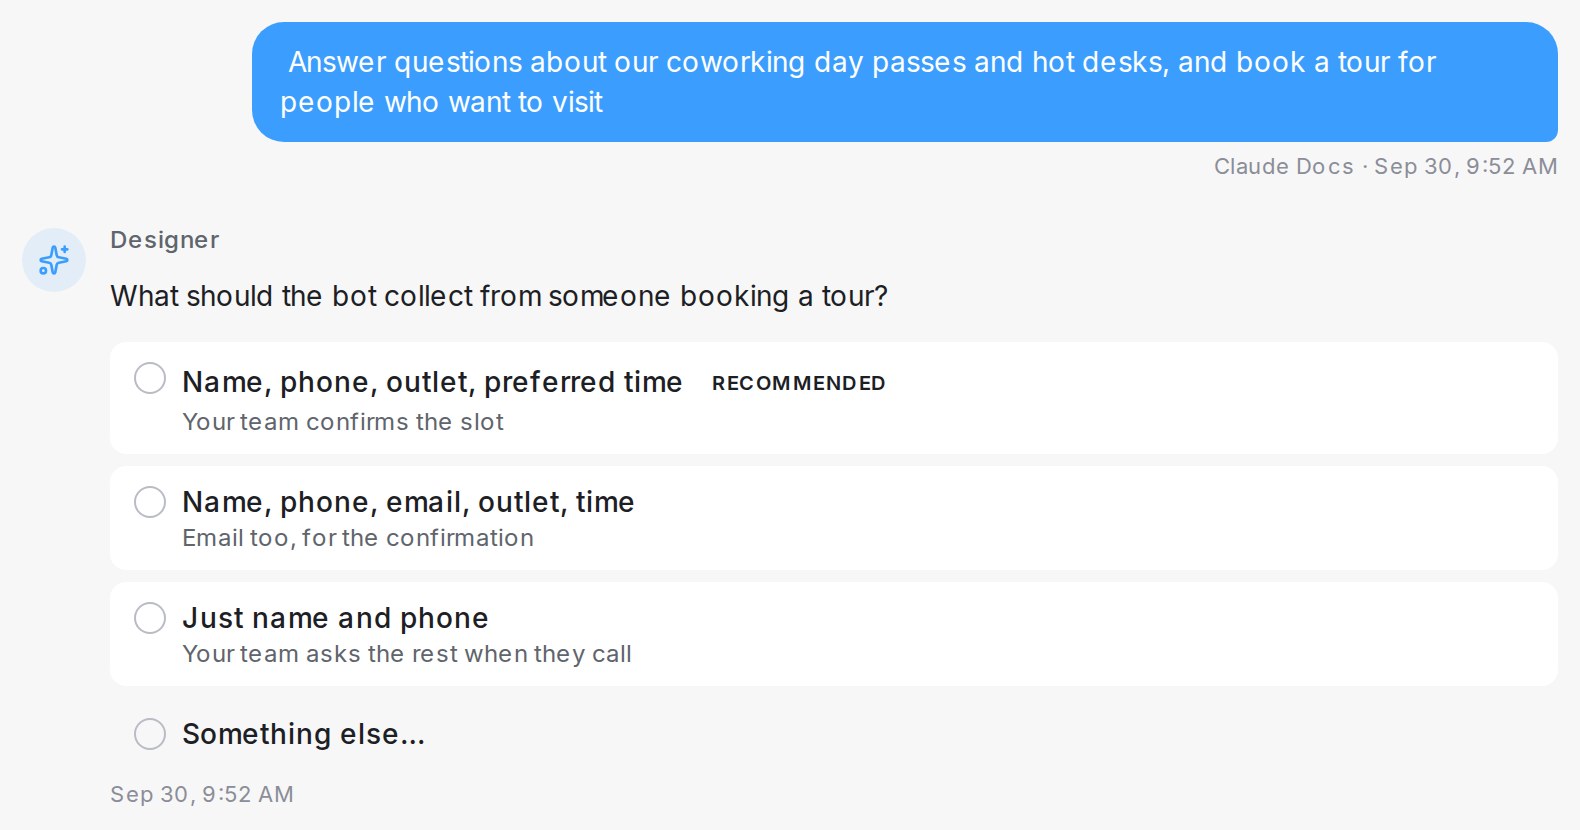
For a new bot, the designer asks up to three questions before it plans, one at a time. It only asks about what your message didn’t already say. It usually doesn’t ask which details to collect or how the chat ends: it picks the usual choice for your kind of business, such as name, phone and preferred time with your team confirming, and says so in the plan so you can change it.
- Choice questions come with two or three answers, one marked Recommended. Click an answer, or Something else… to type your own.
- Open questions, such as “What should the bot tell customers you sell?”, open an answer box with an example already filled in. Edit the example so it is true for your business, then click Send answer.
- When the bot needs a detail only you have, such as a booking link, a price or an address, the designer asks for it. It never makes one up or leaves a placeholder in a message.
Check the plan, then build
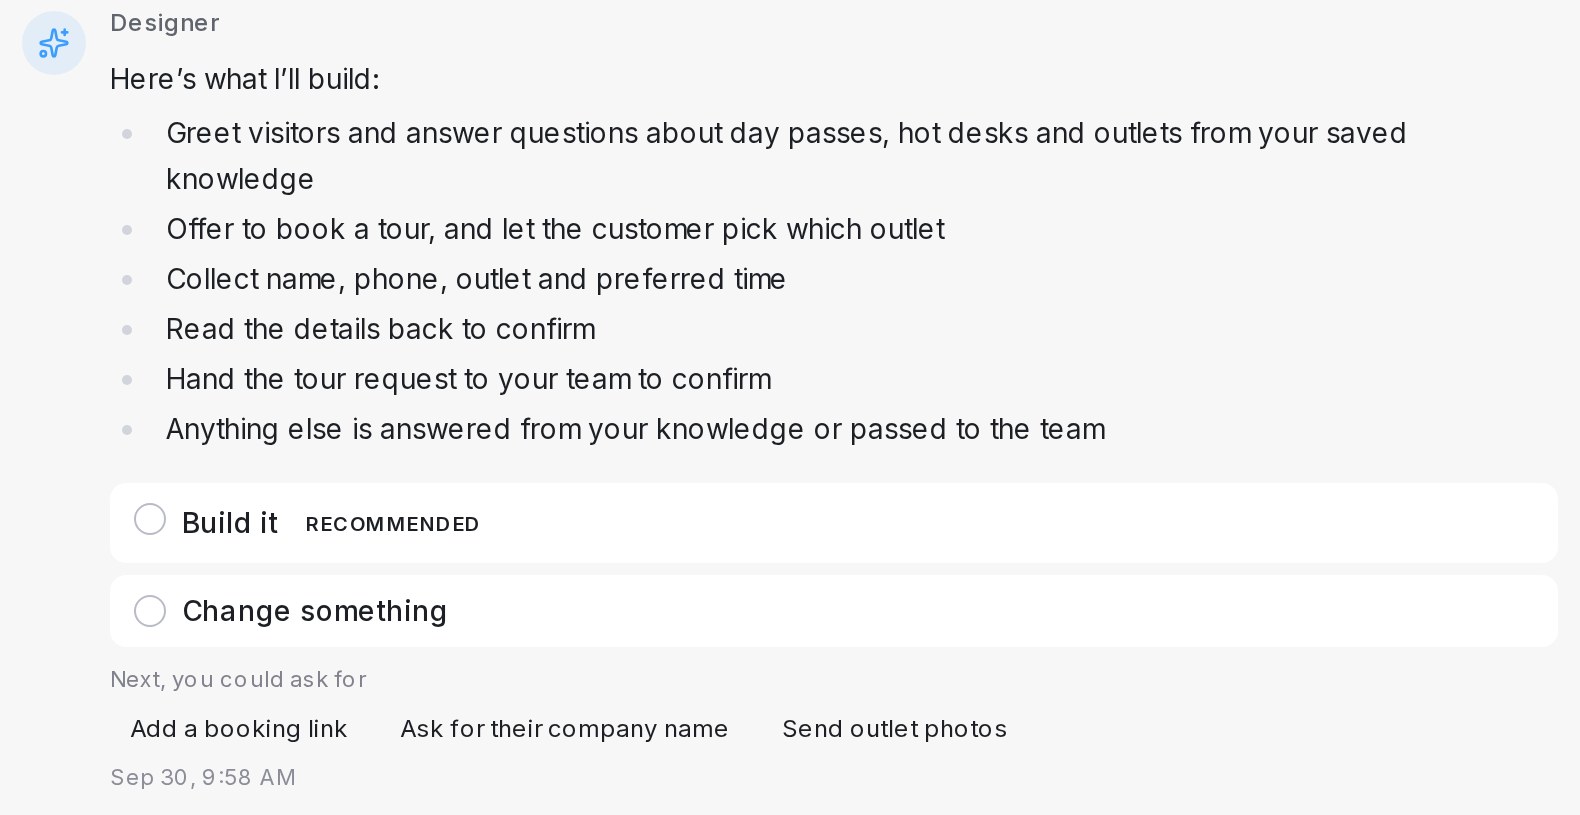
When nothing important is missing, the designer shows the plan in a few short lines, including any defaults it picked for you.
- Click Build it to build the agent, or Change something to adjust the plan first.
- While it works, you see each stage, such as Building your bot and Writing the summary.
- The reply explains what the agent now does. Under it, Your bot was updated offers See how it works, which opens the review panel, and Test it.
- Under Next, you could ask for, click a suggestion to send it straight away.
Change your agent later
Type the change in the same chat, for example “Ask for their email too” or “Also ask which branch they prefer”. The designer makes the change straight away and tells you what changed. If a request could mean two different things, it asks one question first.
Review the flow and test it
Click Review flow at any time to open the review panel beside the chat. It has three tabs: Flow shows the canvas, Test lets you chat with the agent as a customer, and History lists a snapshot of every change the designer made, so you can Restore an earlier version. Click Keep panel open to keep it next to the chat while you work.
Send photos, PDFs and voice notes
- Photos and PDFs. Paste or drop them into the chat, or click Attach an image or file. The designer reads what is in them, such as a price list or a menu, and uses it to build the agent. The same file can also be sent to customers, for example “Send the price list when someone asks for prices”. You can attach up to 8 files per message, each up to 40 MB. The designer reads up to 4 images per message.
- Voice notes. Click Record a voice message, speak, then click Stop and send. You see the sound wave while you speak. Anything you typed or attached goes out with the voice note as one message, and the words the designer heard appear under Transcript.
PDF limits by plan
How much of a PDF the designer reads depends on your plan:
| Plan | PDF size | Pages |
|---|---|---|
| Free plan | Up to 5 MB | Up to 10 pages |
| Paid plans | Up to 30 MB | Up to 100 pages |
A PDF over the limit isn’t read, and the chat says why: it says the file is “too big” when it is over the size limit, or “too long” when it has too many pages. On the free plan the message also names the paid limits and shows See paid plans, which opens Billing. To fit within the limit, split the PDF or send just the pages you need.
Files the designer can’t read
If a file is damaged, password-protected or not really a PDF, the designer tells you which it is, for example “isn’t really a PDF” or “password-protected”, and asks you to send a proper PDF or type the key details. It never guesses what the file contains. The same check applies when a customer sends such a file to your live agent: the agent is told the file couldn’t be read, and no AI summary appears under it in the conversation.
Switch to the classic view
Click Switch to classic view at the top of the designer to go back to the layout with the chat on the left and the canvas on the right. Click Try the new chat designer to come back. The choice is yours only: each person on your team picks their own view.