
An inbox is connected to one flow agent, its main agent. Two settings let other flow agents of your workspace answer on the same inbox, so you don’t have to merge everything into one big flow:
- Start keywords: the customer sends a keyword and gets the agent it opens. Good for a menu of demos or services.
- Labels that switch the bot: a chat that gets a label is answered by another agent. Good for after-sales, renewals and other replies to a message you sent.
Where to set it up
- Open the main flow agent in the designer and click Inboxes in the header.
- Tick the inbox. Its settings open under it.
- Scroll to Start keywords and Labels that switch the bot, at the end of the inbox’s settings.
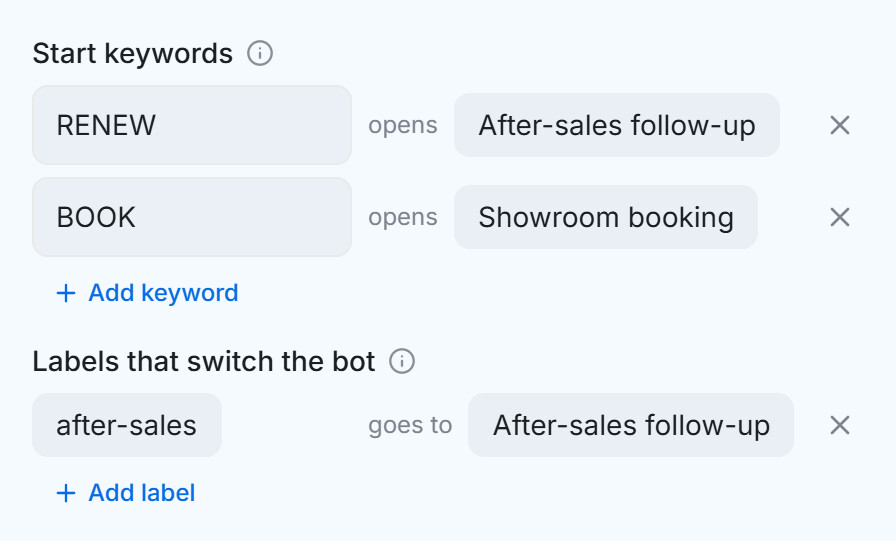
The other agents must be published. Everything else you set for the inbox here (active hours, labels to skip, pause when a human replies) applies whichever agent answers.
Start keywords: the customer picks the agent
- Under Start keywords, click Add keyword.
- Type the keyword and choose the agent it opens.
- Click Go live or Save.
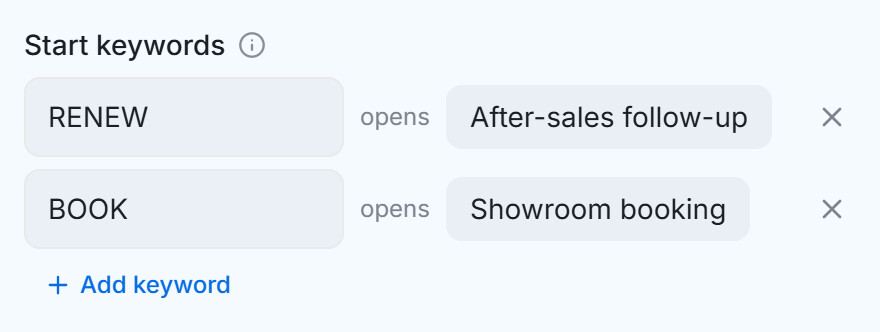
What the customer gets:
- The keyword must be the whole message. Capital letters don’t matter, so “renew” and “RENEW” both work, and “what is RENEW” does not.
- The agent starts from its first step and reads the chat from the keyword onward.
- The chat stays with that agent until the customer sends another keyword. Add a keyword that opens the main agent, such as MENU, so they can come back.
- A keyword does nothing while your team has paused the chat.
Labels that switch the bot: a label picks the agent
- Under Labels that switch the bot, click Add label.
- Choose the label and the agent the chat goes to.
- Click Go live or Save.
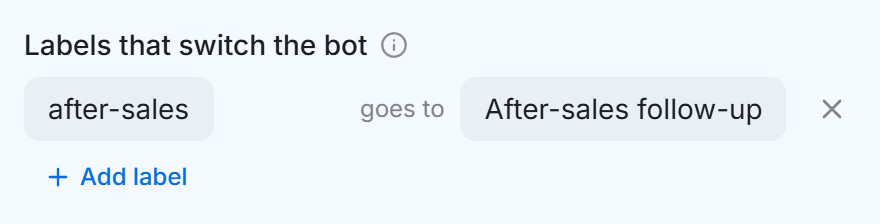
When a chat gets the label, the customer’s next message is answered by that agent from its first step, whatever they write. The agent can read the earlier chat, including the message that asked for the reply, and the main agent stays quiet.
To use it for a message you send, add two actions to the automation rule that sends it, in this order: Remove a Label, then Add a Label, both with the same label. Removing it first makes the agent start again for each new message, and it asks its questions again instead of reusing the last answers.
Send the chat back to the main agent
The chat goes back when the label that moved it is removed: the customer’s next message is answered by the main agent, from its first step.
A flow step can add a label but cannot remove one, so use a second label and one automation rule:
- On the last step of the other agent’s flow, under Actions, add a label such as
after-sales-done. - Create an automation rule that runs when that label is added, with two Remove a Label actions: the label that switches the agent, and
after-sales-done.
Good to know
- A start keyword the customer sends wins over a label.
- When two labels in the list are on the chat, the first one in the list wins.
- Only the conversation’s labels count, not the contact’s.
- While your team has paused a chat, a label does not bring an agent back.
- Renaming a label keeps its chats where they are. Deleting it sends them back to the main agent.